
Brad Nailer vs Finish Nailer: Which Tool Wins?
This post contains affiliate links. As an Amazon Associate, we earn from qualifying purchases.
A brad nailer drives thin 18-gauge wire nails for delicate trim and glue-ups, while a finish nailer shoots thicker 15- or 16-gauge nails for stronger, structural trim work like baseboards and crown molding. The finish nailer offers more holding power and angled magazines, but the brad nailer leaves nearly invisible holes and is far less likely to split wood. For most DIYers, the 18-gauge brad nailer is the more versatile first tool; step up to a finish nailer once you’re tackling thicker stock or trim that will get regular contact.
The word “nailer” makes it sound simple, but that first trip to the hardware store can feel like learning a new language. Gauge numbers, PSI settings, straight versus angled magazines, it’s a world of specifics disguised as one tool. Getting it wrong doesn’t just mean pulling a few nails. Use a brad nailer on heavy crown molding, and you’ll hear that trim creak loose after a few months. Use a finish nailer on a delicate picture frame, and you’ll spend more time filling visible craters than you did building the piece.
This walkthrough tackles the brad nailer vs finish nailer difference head-on. We’ll break down the specs that matter, translate holding power into real numbers, and map each tool to the jobs they’re actually built for. By the end, you’ll know whether to reach for the brad or the finish nailer for your next project, and what happens when you pick the wrong one.
Key Takeaways
- Thinner gauge means a smaller hole. An 18-gauge brad is about 0.0475 inches thick, leaving a hole you can often fill with a dab of putty. A 15-gauge finish nail is significantly thicker, demanding a more involved filling process.
- Holding power is not a marketing term. In pine without glue, an 18-gauge brad resists 10–20 lbs of pull-out force, while a 16-gauge finish nail holds 20–30 lbs. For anything under stress, the thicker nail wins.
- Once trim exceeds 3/4 inch, switch tools. The general rule from material guides is to step up from a brad nailer to a 16-gauge finish nailer when the material thickness passes that mark, faces dense hardwood, or needs structural integrity.
- According to HGTV, brad nailers are limited to a 90-degree magazine, making them harder to maneuver in tight corners.
- Air pressure is not optional. For an 18-gauge brad nailer in softwoods like pine, start at 70–80 PSI. Drive that same nail into oak, and you’ll need 90–100 PSI to seat it flush without crushing the wood fibers.
Gauge and Holding Power: The Numbers That Decide
Ever wonder why a 15-gauge nail feels so much more substantial than an 18-gauge brad? The gauge number is your direct line to its thickness, and by extension, its strength. Gauge runs backwards: a higher number means a thinner nail. An 18-gauge brad nail has a diameter of either 0.0475 inches (per Woodwiki) or 0.0478 inch (per The Craftsman Blog). That tiny wire drives cleanly and leaves a minimal hole. Step down to a 16-gauge finish nail, and you’re looking at 0.0625 inches (Woodwiki) or 0.0598 inch (The Craftsman Blog). The 15-gauge is thicker still at 0.072 inches or 0.0673 inch, depending on your source.
Where sources disagree: The exact thickness of nails varies slightly between manufacturers and measurement standards. The Craftsman Blog lists an 18-gauge brad at 0.0478 inch, while Woodwiki cites 0.0475 inches. Treat published diameters as close approximations, not absolute law, always verify the gauge printed on the nail packaging matches your nailer.
These small differences in diameter translate into massive changes in holding power. The WoodWiki guide on 18-gauge nails provides concrete withdrawal resistance figures: an 18-gauge brad in pine resists 10–20 lbs of pull-out force. A 16-gauge finish nail in the same wood manages 20–30 lbs. The 15-gauge finish nail tops the chart with the highest resistance. Those numbers are for nails alone, without adhesive. Add wood glue to the equation, and the joint’s strength multiplies, with the brads acting as clamps while the glue cures.
| Nail Gauge | Typical Diameter | Withdrawal Resistance (Pine, no glue) | Best Tool For |
|---|---|---|---|
| 18-gauge (Brad) | ~0.0475″ | 10–20 lbs | Thin trim, cabinet face frames, glue-up clamping |
| 16-gauge (Finish) | ~0.0625″ | 20–30 lbs | General trim, baseboards, window casing |
| 15-gauge (Finish) | ~0.072″ | Highest | Crown molding, door jambs, heavy/structural trim |
Choosing the wrong gauge isn’t just about strength. That thinner 18-gauge brad is far less likely to split narrow trim or delicate wood. The thicker 15- and 16-gauge finish nails exert more wedging force as they drive in. On a fragile workpiece, you’ll hear a faint crack before you even see the split. On the flip side, trying to drive an 18-gauge brad through dense oak with insufficient air pressure can lead to deflection, the nail bends inside the material, jamming the tool and leaving a useless fastener in a common brad nailer vs finish nailer mistake.
If your brad keeps bending or the head won’t seat, stop. Check your air pressure first, then ask if you’re using the right tool. A brad nailer isn’t a weak finish nailer; it’s a precision tool for a different job.
Project Matching: When to Use Each Nailer
Forget “light” versus “heavy” duty. The real answer lies in the thickness of your material and the amount of stress the joint will see. Here’s the breakdown, straight from the guides and manuals.
An 18-gauge brad nailer is your go-to for any task where visibility, splitting risk, or temporary clamping matters more than raw strength. Think quarter-round over a painted baseboard, tacking on a cabinet door stop, or securing a thin drawer bottom. It’s the perfect clamp for a glue-up, holding pieces rock-steady while the adhesive sets. The best brad nailers for this work balance reliability with a precise depth-of-drive adjustment.
Common mistake: Using a brad nailer for full-thickness baseboard in a hallway. It might hold for a week, but regular foot traffic will work those thin nails loose. You’ll hear the trim creak against the wall with every pass.
Once your trim stock passes 3/4 inch in thickness, or if it will face regular contact or stress, it’s time for a finish nailer. That rule covers baseboards, crown molding, door and window casing, and stair risers. For these, you’d choose a 16-gauge finish nailer for most general trim, or step up to the 15-gauge nailer for crown molding and heavier stock. The best finish nailers for these jobs offer that crucial angled magazine option for getting into tight corners.
A finish nailer’s real advantage is that it can create a strong joint without adhesive. You wouldn’t use a brad nailer to install a door jamb, but a 15-gauge finish nailer is strong enough for the job, according to The Craftsman Blog. The larger head on a finish nail holds materials together better as the wood expands and contracts with seasons. That’s why for a finish nailer vs framing nailer comparison, the finish nailer is the clear choice for interior trim, while the framing nailer handles the heavy structural work.
The Magazine Angle: A Hidden Limitation
Here’s a detail most first-time buyers miss: most brad nailers are limited to a straight, 90-degree magazine. It’s a compact design that keeps the tool lightweight and simple. A finish nailer, however, often offers an optional angled magazine, usually 21 or 35 degrees. This angled design makes a major difference for fitting the tool into tight spaces, like the inside corner where a wall meets a ceiling for crown molding.
If you’re planning a lot of crown or casing work, that angled magazine isn’t a luxury; it’s a necessity. It changes the entire ergonomics of the job, letting you hold the tool at a comfortable angle while still driving nails squarely into the work. This is a key point in any angled vs straight finish nailer debate. For a brad nailer, you don’t get that choice. You’ll be maneuvering the entire tool to drive nails squarely, which can be awkward and slow.
Pneumatic vs. Cordless: The Reliability Debate
You’ll find both brad and finish nailers in pneumatic (air-powered) and cordless (battery) models. The cordless argument is seductive: no compressor, no hose, complete freedom. And for a quick trim job or a site with no power, a cordless trim nailer is incredibly convenient. Modern cordless vs pneumatic nail gun comparisons show battery life has improved dramatically.
But there’s a trade-off. Pneumatic nailers are lighter, often more affordable, and mechanically simpler, fewer parts to fail. A pneumatic brad nailer can be significantly less expensive than a high-end cordless model. They also offer more consistent power shot-to-shot; the compressor’s tank acts as a reservoir, so each nail drives with the same force. A cordless nailer’s power depends on the battery charge, and that last shot on a dying battery might not seat the nail fully.
I’ve seen cordless nailers praised for their convenience, and it’s real. But I keep a pneumatic brad nailer in my shop for one reason: when I need to fire a hundred nails in an afternoon, I don’t want to think about battery swaps or a motor slowing down. The hose is a hassle, but the consistency is worth it.
Cordless models also introduce electronics that can fail. While researching, a user report on DIYChatroom noted that two Senco AF25 battery nailers (12V and 14V models) malfunctioned with light use, both requiring service within 9 months. That’s not a brand indictment, but a reminder that a motor, switch, and battery is a more complex system than an air cylinder and a trigger valve. For frequent use, many prefer pneumatic for its consistent power and mechanical simplicity. For occasional use, the convenience of cordless might win.
Air Pressure and Operation: Getting it Right
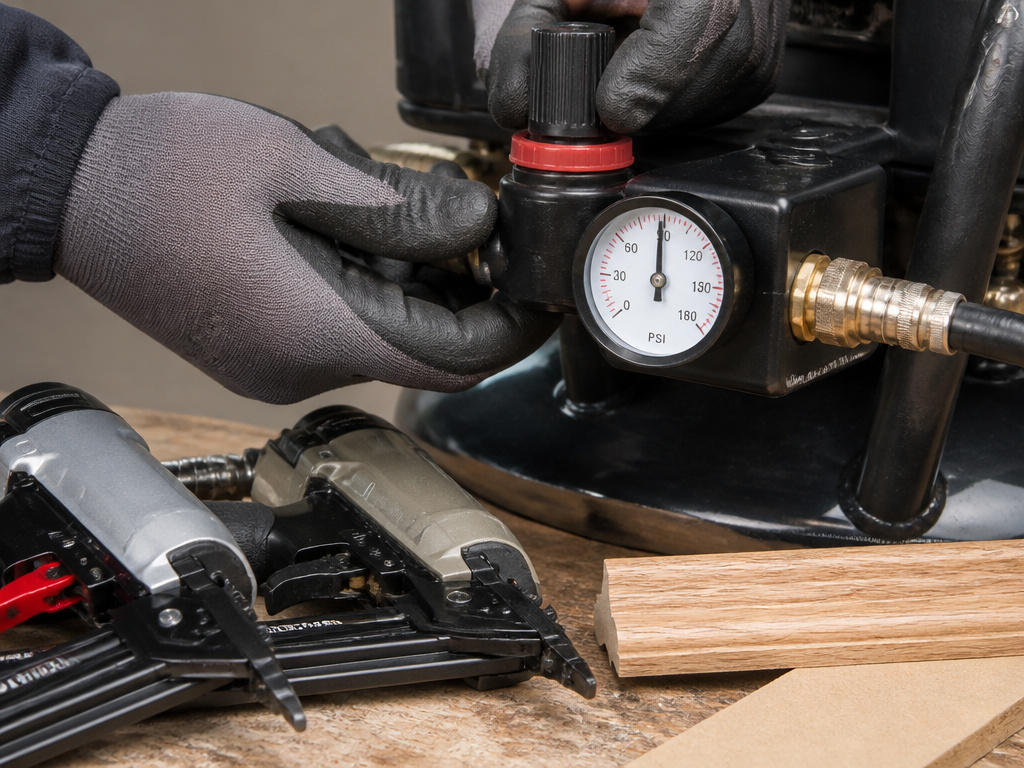
Owning the right nailer is half the battle. Using it correctly is the other half. This is especially true for pneumatic tools, where air pressure is your primary control.
The required PSI isn’t a guess. It’s dictated by the density of the wood you’re driving into. The 18-gauge brad nail specifications from Woodwiki provide a clear chart: start at 70–80 PSI for softwoods like pine or poplar. For medium hardwoods like cherry, walnut, or birch plywood, bump it to 80–90 PSI. Tackling oak or maple? You’ll need 90–100 PSI. Even engineered materials like MDF or hardboard require higher pressure, around 100–110 PSI, because they’re more resistant to compression.
A common rule from Woodwiki is that the nail must penetrate at least 1/2 inch into the backing piece. So, for 3/4-inch thick trim going into drywall, you’d need a nail at least 1 1/4 inches long to hit that minimum. Always measure the combined thickness of your trim and its substrate before loading nails.
Here’s a quick safety and operation checklist, drawn from user guides:
- Wear safety glasses. Every time. A deflected nail or a fragment from a blown-out knot is a real hazard.
- Test on scrap first. Use a piece of the same material and thickness as your project. Adjust the depth setting until the nail head sits 1/64 inch below the surface.
- Mind the grain. Brad nails have a chisel point. Orient the nailer so that chisel cuts across the wood grain, not parallel to it, to prevent splitting.
- Avoid knots. If you must nail near one, pre-drill a pilot hole. The dense, irregular grain will almost certainly deflect or bend the nail.
- Clear jams with power off. Whether pneumatic or cordless, disconnect the air hose or remove the battery before attempting to clear a jammed nail.
Can One Tool Substitute for the Other?
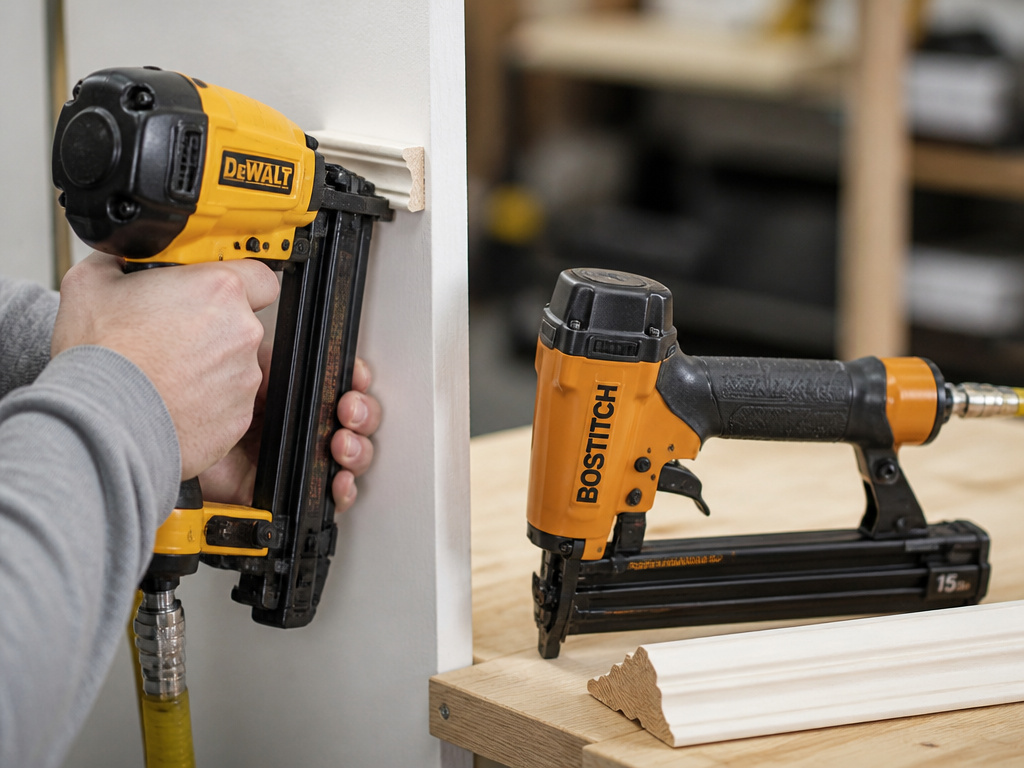
This is the core question behind every brad nailer vs finish nailer search. Can you get by with just one?
Technically, you can use a finish nailer for every job a brad nailer does. But you shouldn’t. You’ll be dealing with larger, more visible holes that require more filler and a higher risk of splitting delicate trim. Conversely, a brad nailer simply cannot provide the holding power needed for structural trim. Using it on baseboard or crown molding is a temporary fix at best.
For the vast majority of DIYers tackling interior projects, my recommendation is this: start with an 18-gauge brad nailer. It will handle the majority of your trim, cabinet, and assembly work. Its learning curve is gentler, and the results are more forgiving. Once you start projects that involve thicker stock, crown molding, or anything you’d lean against or bump into regularly, then invest in a 15-gauge finish nailer. This two-tool combo, as The Craftsman Blog notes, covers almost any task.
Between the 15 vs 16 gauge finish nailer, I lean toward the 15-gauge. It offers the highest withdrawal strength for heavier trim, and the nails are still manageable to fill and finish. The 16-gauge is a fantastic all-rounder, but The Craftsman Blog suggests that having an 18-gauge brad nailer and a 15-gauge finish nailer covers almost any task.
Frequently Asked Questions
Should I get a finish nailer or brad nailer first?
Get the brad nailer first. It’s more versatile for the small projects, repairs, and detailed work that make up most DIY to-do lists. You can always add a finish nailer later when you tackle larger trim jobs.
Can a brad nailer be used as a finish nailer?
No, not effectively. While you can physically fire brads into most trim, they lack the holding power for anything beyond very light, decorative pieces. Using a brad nailer for baseboards or crown molding will result in loose trim over time.
Should I use a brad nailer or finish nailer for baseboards?
Use a finish nailer for baseboards. Baseboards are thick, face regular contact, and need solid anchoring. A 16-gauge or 15-gauge finish nailer is the correct tool. If you only have a brad nailer, you must use construction adhesive alongside it, and even then, it’s not the recommended method.
Will a brad nailer go through a 2×4?
It can, but it shouldn’t. A 2-inch brad nail might penetrate a 2×4, but the thin gauge provides almost no structural holding power. For framing or attaching to dimensional lumber, you need a framing nailer or, at minimum, a 15-gauge finish nailer with a long nail designed for the task.
Is a cordless brad nailer worth it?
It depends on your workflow. For mobile contractors or jobs with no power source, yes. For a home workshop where a compressor is available, a pneumatic brad nailer is often cheaper and mechanically simpler. Evaluate the best cordless trim nailers based on your need for portability versus your budget.
Before You Go
The brad versus finish nailer choice isn’t about good and bad. It’s about matching a specialized tool to a specific job. The 18-gauge brad nailer is your detail artist, perfect for the fine work where looks matter. The 15-gauge finish nailer is your installer, brute-strong and built for the long haul.
Most guides end by telling you to buy both. Be practical: start with the brad nailer. Master it. Use it on picture frames, window stops, and cabinet trim. Listen to the sound it makes when a nail seats flush, a soft, solid pfft. When you finally take on a project that demands a finish nailer, you’ll know. You’ll feel the brad nailer struggling, the trim feeling insecure under your hand. That’s your signal. That’s when you step up to the right tool for the job.
