
How to Sandblast With an Air Compressor: Step-by-Step
This post contains affiliate links. As an Amazon Associate, we earn from qualifying purchases.
*To sandblast with an air compressor, you must have a compressor that delivers more CFM than your blaster consumes, set the blast pressure at least 10psi below your compressor’s re-pressurize cycle trigger point, and use air dried to below 200 parts-per-million moisture.* The nozzle orifice size determines your air and abrasive consumption, and wearing a NIOSH-approved respirator is non-negotiable.
You’ll find that most failures aren’t about the blaster itself. They’re about what feeds it, an undersized compressor, wet air, or abrasive that absorbed last week’s humidity. Understanding how to sandblast with an air compressor prevents this mismatch, which is why so many first-timers end up with a sputtering gun and a half-stripped project.
Here’s a walkthrough of the entire process, from choosing the right air compressor size to troubleshooting the first blast. This guide to how to sandblast with an air compressor covers the safety rules that actually matter, why manufacturers give conflicting instructions, and the settings that get you from setup to clean metal in one afternoon.
Key Takeaways
- Your compressor’s CFM rating must exceed the sandblaster’s air consumption, which is dictated by nozzle size, a 1/8″ nozzle can demand over 20 CFM at 125 PSI.
- Always set your blast pressure at least 10 PSI below your compressor’s minimum working pressure to prevent backflow that destroys the blaster’s internal valves.
- Moisture above 200 PPM in your air supply will turn abrasive media into a solid clog inside the tank and hoses, sometimes within minutes.
- A NIOSH-approved respirator is mandatory, not optional; silicosis is a permanent, irreversible lung disease caused by inhaling abrasive dust.
- After each session, the decision to depressurize depends on your blaster’s design, pressure pots should be emptied and depressurized daily, while some systems are designed to stay pressurized for a full shift.
The Critical Pre-Setup: CFM, Pressure, and Dry Air
Open your blaster’s manual and skip to the specs. The numbers you need are the Working Pressure range and the required air volume. The Comco MicroBlaster MB1002, for example, lists a working range of 40 to 125 PSI and a maximum air volume of 2.4 SCFM. Your compressor must be able to supply within that pressure window and exceed that volume demand continuously.
For a 0.030″ nozzle, 0.025″ tank orifice, and 25 micron aluminum oxide, the Comco MicroBlaster MB1002 uses about 60 standard cubic feet per hour at 80 PSIG. A full 2-pound abrasive tank lasts roughly 4 hours of blast time under these conditions.
The most common mistake is matching the compressor’s tank size to the blaster’s tank size. That’s irrelevant. What matters is the compressor’s continuous CFM output at your desired blast pressure, a core principle of how to sandblast with an air compressor. The compressor is the heart; if it can’t keep up, the blaster starves.
Where this goes sideways: setting the blast pressure higher than your compressor can sustain. The Comco manual states the danger plainly: if the inlet pressure drops below the blast pressure setting, air and abrasive flow backwards through the system. This backflow damages internal valves and mixers. The fix is simple: set your blast pressure regulator at least 10psi below your compressor’s re-pressurize cycle trigger point. If your compressor kicks back on at 90 PSI, don’t blast above 80 PSI.
Dry air is also essential. The spec for the Comco is a maximum of 200 PPM moisture and 10 PPM oil, with particles no larger than 5 microns. Your compressor’s built-in water trap isn’t enough. You need a positive air dryer in the line, inspected monthly. Moisture in the line turns your abrasive into cement. In high humidity, the problem accelerates. The MultiBlast PRO90 manual advises emptying the blast pot of abrasive at the end of each day when operating in environments subject to varying temperature changes or high humidity for exactly this reason.
Essential Gear: More Than Gloves and Goggles
Be realistic. A dust mask from the hardware store is a placebo here. The sandblasting safety protocols from every manufacturer are unanimous on one point: you need an approved NIOSH respirator. The manual for The Home Depot Sandblaster (M1115) states it in the first safety rule. Silica dust and metal particulates don’t just irritate your lungs; they embed themselves permanently.
Hearing protection is next. The MultiBlast PRO90 manual strongly recommends it for the operator, assistant, and anyone in the immediate vicinity. A high-pressure air stream exiting a small orifice is very loud, and the MultiBlast PRO90 manual strongly recommends hearing protection for the operator and nearby personnel.
For your body, thick, abrasive-resistant clothing, a full face shield (or a dedicated blasting helmet), and heavy gloves are the baseline. The environment matters, too. Never blast where flammable vapors are present; electrostatic discharge from the blasting stream can ignite them. And always secure your workpiece. Blast pressure can turn a loose car part into a dangerous projectile.
Step-by-Step Setup and First Blast
Now for the actual process. Assume you have a typical pressure-pot sandblaster like the MultiBlast PRO90 or The Home Depot M1115, and a compressor that meets the compressor requirements.
Step 1: Assemble and Connect. Connect your air compressor to the blaster’s inlet using a hose rated for your pressure. Install a water separator and air dryer as close to the blaster as possible. Connect the blast hose to the gun and the pot’s outlet. Visually inspect every connection and use safety clips.
Step 2: Load the Abrasive. Before opening the tank, ensure the air supply is disconnected and the tank pressure gauge reads zero. This is a universal safety step from The Home Depot’s manual. Fill the tank with your chosen dry abrasive, steel grit for heavy rust, glass bead for softer metals, but do not overfill. Leave space for the media to fluidize. Close and seal the lid securely.
Common mistake: Reusing abrasive that has been stored in a damp garage. The media absorbs atmospheric moisture. When you blast, that moisture flashes off in the line, then re-condenses downstream, creating a damp plug that stops all flow. Always use fresh, dry media or media stored in an airtight container.
Step 3: Pressurize the System. Open the compressor’s outlet valve slowly. Listen for leaks in the air line leading to the blaster. Then, open the blaster’s main air inlet valve. The pressure will now build in the system up to the control valve.
Step 4: Set the Pressure. With the deadman trigger or control valve closed, adjust the pressure regulator on the blaster to your desired setting. Refer to your media and project needs, but start low. For the Escablast ClearBlast CB450, the pump regulator should be set to 40 PSI and pot pressure to 130 PSI. For dry blasting, consult your blaster’s manual for its operating pressure range.
Step 5: Test and Adjust Media Flow. Don your safety gear. Aim the nozzle into your blast cabinet or at a safe, contained area. Engage the trigger. You should hear a rush of dry air. Now, slowly open the abrasive metering valve (often a knob on the pot or gun). You’ll see the stream change from clear to a dense, smoky cloud of abrasive. Adjust until you have a consistent, aggressive stream.
That’s the sequence. The first pull of the trigger is always a test. If you get only air, your media valve is closed or your pot isn’t pressurized. If you get a weak, sputtering stream, check for moisture clogs or an undersized compressor.
Navigating the Depressurization Debate
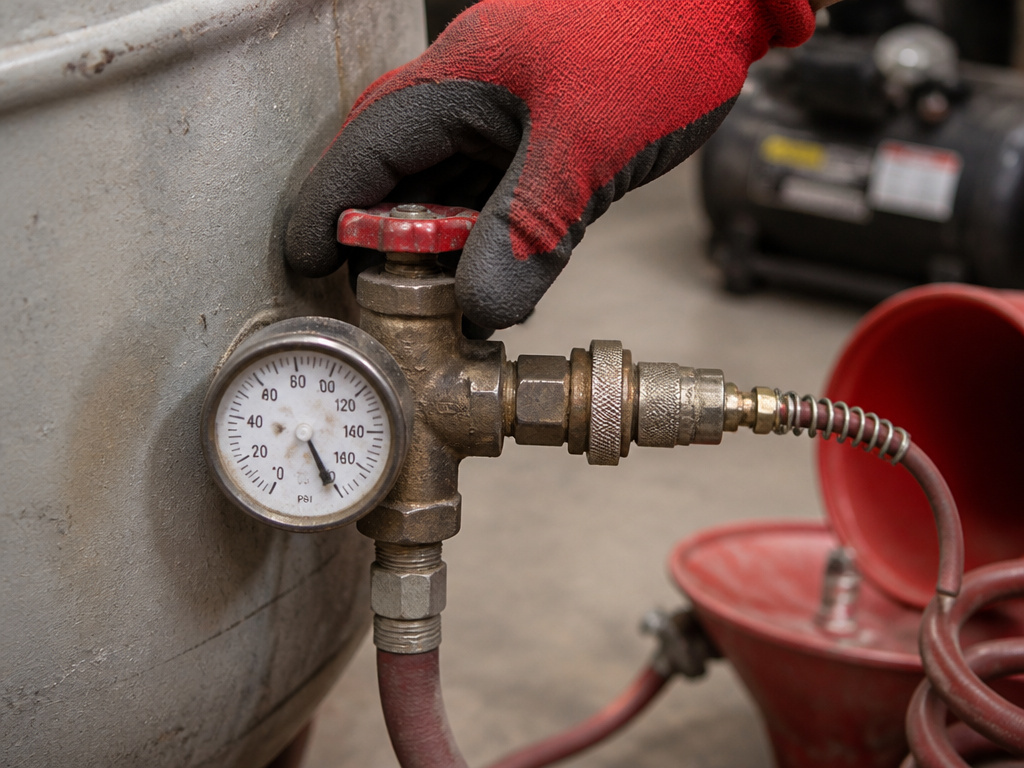
Here’s a point of genuine conflict in the manuals. What do you do with the pressure when you’re done for the day?
| Manufacturer / Model | Instruction | Reasoning |
|---|---|---|
| Comco MicroBlaster MB1002 | No need to depressurize after each use. Designed to stay pressurized for a full work shift. | Frequent shutdowns cause excessive valve wear and waste abrasive during repressurization. |
| MultiBlast PRO90 | Depressurize the blast pot once emptied at the end of each day. | Prevents condensation buildup in the vessel overnight, which would dampen remaining abrasive. |
| The Home Depot Sandblaster (M1115) | Always disconnect air supply and exhaust tank air when leaving the blaster. Relieve all pressure before opening the tank. | Standard safety protocol to prevent accidental discharge or unsafe tank opening. |
So who’s right? They all are, for their specific system design. The Comco is a precision micro-blaster with different valves. The pressure pot systems (MultiBlast, Home Depot) are dealing with larger volumes of abrasive that can solidify if damp. The safe rule depends on your blaster’s design: pressure pots like the MultiBlast PRO90 and The Home Depot Sandblaster should be depressurized daily or when leaving, while the Comco MicroBlaster MB1002 is designed to stay pressurized for a full shift. The risk of a moisture-clogged pot tomorrow is higher than the minimal wear from a depressurization cycle today.
Troubleshooting: Weak Blast, Clogs, and Inconsistency
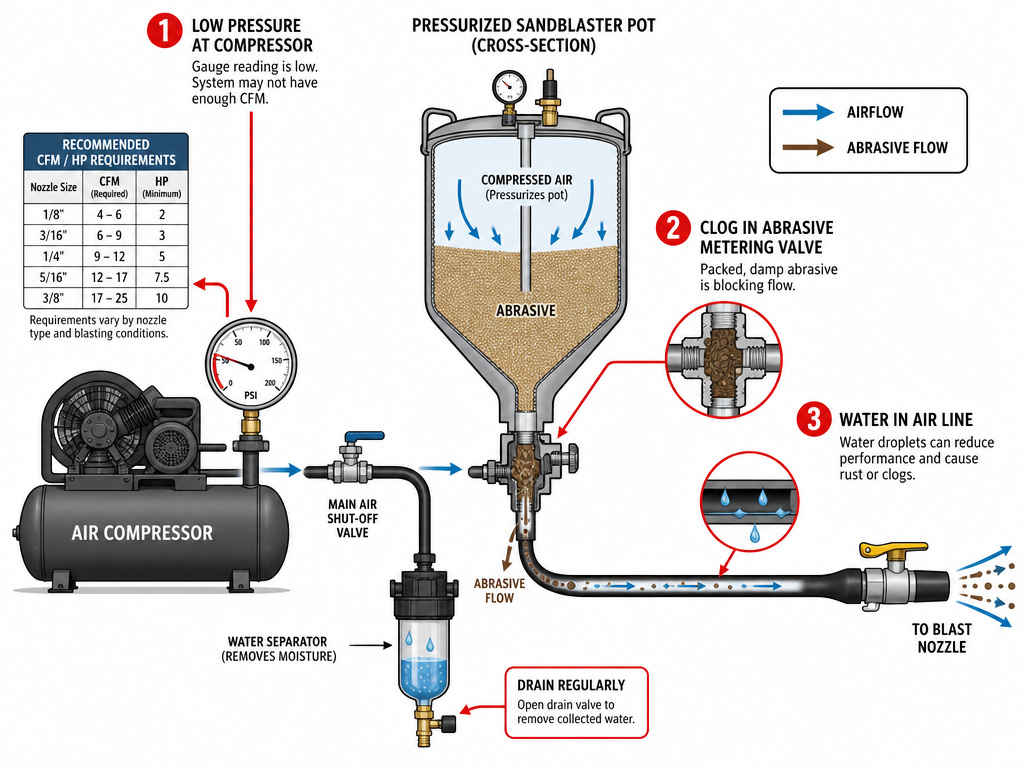
You followed the steps, but the result is weak. We can diagnose the problem.
Problem: Weak or Sputtering Blast Stream
- Cause 1: Compressor cannot keep up. It’s running continuously but pressure still drops.
- Fix: Check your required compressor size chart. You may need a larger compressor or a smaller nozzle. The Home Depot Sandblaster (M1115) manual provides a clear table: for a 1/2″ ID hose, 50 ft length, 1/8″ ID nozzle, a 7 HP compressor delivering 20 CFM at 125 PSI is required.
- Cause 2: Abrasive metering valve is not open enough or is clogged.
- Fix: Close the valve, depressurize, and inspect the pickup tube and valve seat for a damp plug of media.
Problem: Intermittent or No Abrasive Flow (Air flows fine)
- Cause: Clog in the abrasive feed line, often due to damp media or a kinked hose.
- Fix: Depressurize and disconnect the blast hose. Check for a hardened plug of media. This is where using the wrong types of media matters, fine, dusty media is more prone to clumping.
Problem: Moisture Spray from the Nozzle
- Cause: Air dryer or water separator is saturated or bypassed.
- Fix: Drain your compressor tank and all water traps. Ensure your inline dryer is functioning. In very high humidity (90-100%), The Home Depot manual advises reducing the abrasive load in the tank and emptying the water trap more frequently.
The sound of a healthy blast is a consistent, angry hiss. If it coughs, sputters, or cycles with your compressor motor, the issue is almost always upstream, in the air supply.
Choosing Your Gear: Siphon, Pressure Pot, or Cabinet?
Your project scope decides the tool. Understanding the types of sandblasters is the first real choice.
| System Type | Best For | Air Demand | Key Limitation |
|---|---|---|---|
| Siphon (Gun-Only) | Spot work, small areas, light rust. | Lower. Works with smaller compressors. | Inefficient. Uses more air per unit of abrasive, slower cleaning. |
| Pressure Pot | Large surfaces, auto parts, fences. | High. Demands a serious compressor (12+ CFM typical). | Portable but cumbersome. Creates massive dust clouds. |
| Blast Cabinet | Detailed parts, small items, clean workshop work. | Moderate. Contained system reduces waste. | Size-limited. You can only fit what’s inside the cabinet. |
For a home shop tackling car parts or furniture, a sandblast cabinet is the smart buy. It contains the mess, recycles media, and dramatically improves visibility and control. The siphon vs pressure debate ends there, a cabinet is almost always a pressure-fed system, giving you the power of a pressure pot without the environmental chaos.
If you’re working outdoors on something like a steel beam or a boat hull, a portable pressure pot is your only option. Just be prepared with a massive air supply. That’s industrial-scale air.
Before You Go
Sandblasting feels like magic when it works, a century of grime vanishing in a cloud of dust. But the magic is mechanical. It depends on dry air, sufficient volume, and the discipline to follow the safety rules that seem like overkill until you breathe in a lungful of silica.
Start small. Test your setup on a scrap piece of metal. Dial in the pressure and media flow before you touch your project. And if you’re staring down a rusty classic car frame, remember that removing rust with a sandblaster is effective, but it’s also the most demanding application for your compressor. You might be better off with a professional blaster or a different rust removal method.
The one upgrade that pays off immediately isn’t a bigger tank or a fancier gun. It’s the best air dryer you can afford. Everything else in the process flows from dry, clean air.
Building a Homemade Sandblaster
Constructing your own sandblaster requires careful attention to pressure safety and component durability. While specific designs vary, the core principle involves a pressurized vessel that mixes air and abrasive. You must ensure all fittings, valves, and the vessel itself can withstand the pressures involved. Commercial units have maximum pressure ratings, often around 125 psi, and your homemade version must be built to a safe standard exceeding your intended operating pressure. Always incorporate a reliable pressure relief valve. Remember to disconnect the air supply and completely depressurize the tank before performing any maintenance or attempting to open it for refilling abrasive.
Frequently Asked Questions
Can you use a sandblaster with any air compressor?
No. You must match the sandblaster’s CFM (cubic feet per minute) consumption, which is driven by nozzle size, to your compressor’s continuous output rating. A small 6-gallon “pancake” compressor might have a low CFM output, while a blaster like The Home Depot Sandblaster (M1115) with a 3/32″ nozzle requires a compressor capable of 6 CFM at 125 PSI. Using an undersized compressor will result in weak, intermittent blasting and can damage the compressor from constant cycling.
What PSI should you sandblast at?
Operating pressure depends on your media, substrate, and blaster. A common starting point for general cleaning with aluminum oxide or sand is 90-100 PSI. Always start lower to avoid damaging the underlying material.
What size air compressor do I need to use a sandblaster?
The size is defined by CFM, not tank gallons. Consult your blaster’s manual for air consumption charts. For example, The Home Depot Sandblaster (M1115) with a 1/2″ ID hose, 50 ft length, and a 1/8″ ID nozzle requires a compressor capable of delivering 20 CFM at 125 PSI, which typically means a 7 HP or larger unit. For The Home Depot Sandblaster (M1115) with a 3/8″ ID hose, 50 ft length, and a 3/32″ nozzle, a 2 HP compressor delivering 6 CFM at 125 PSI is required. The key is sustained flow, not tank capacity.
Is there a sandblaster attachment for a regular air compressor?
Yes, siphon-feed sandblasting guns attach directly to your air hose and draw abrasive from a small bucket. They are the most accessible entry point. However, they are inefficient, consume more air for the same cleaning power, and are best suited for very small, localized jobs. For any serious work, a dedicated pressure-pot system or cabinet connected to a sufficiently sized compressor is a better choice.
