
How to Use Nail Gun With Air Compressor: Step-by-Step
This post contains affiliate links. As an Amazon Associate, we earn from qualifying purchases.
To use a nail gun with an air compressor, connect the air hose, set the compressor’s regulator to your nailer’s required PSI (typically 70-120 PSI), load the correct nails, and fire with the safety nosepiece depressed. The compressor must deliver enough CFM, often 3 to 6 CFM at 90 PSI for a framing nailer, to run the tool without stalling.
That air delivery spec is the part most guides skip. You can hook up the hose and pull the trigger, but if your compressor can’t keep up with the nailer’s air consumption, you’ll get weak drives, frequent stalls, and a motor that overheats before the job is done. A core part of learning how to use nail gun with air compressor is matching the tool to the air supply; it isn’t optional, it’s the first step.
What follows: the seven physical steps to connect and fire, how to read your nailer’s manual for the critical PSI and CFM numbers, the one safety procedure you cannot skip, and a comparison table that shows why a pneumatic nailer still wins for high-volume work.
Key Takeaways
- Always disconnect the air supply before clearing a jam or performing maintenance, this prevents accidental discharge that can cause serious injury.
- Match your compressor’s CFM output to your nailer’s air consumption; a framing nailer needs at least 3-6 CFM at 90 PSI for reliable operation.
- Set the air pressure (PSI) based on nail length and wood density; for hardwoods or long nails, you often need the high end of the range (100-110 PSI).
- Use only clean, dry, regulated air and add a few drops of pneumatic tool oil to the inlet before use to prevent internal corrosion and wear.
- Test fire on scrap material first to dial in the depth setting; a bent nail in your workpiece is much harder to fix than a divot in a test block.
Before You Start: The Non-Negotiables
Before you start: Pneumatic nail guns operate at pressures high enough to drive a fastener through wood and into flesh. Always wear ANSI Z87.1-approved safety glasses and hearing protection. Before any maintenance, especially clearing a jam, disconnect the tool from the air supply and depress the trigger to bleed any residual pressure.
The manuals are unanimous on this. An accidental firing from a pressurized tool left connected can send a nail through a hand or ricochet off a hard surface. The sound power level of these tools can be high; for example, the AIR NAIL GUN MODEL NO: CNG1C manual lists it as 101 dB(A), which is enough to cause hearing damage over time. This isn’t scare talk. It’s the manufacturer’s mandated baseline for the how to use nail gun with air compressor process they built.
Your workspace needs two other things: a stable air supply and the right fasteners. Never use oxygen, CO2, or any bottled gas. Only use clean, dry, regulated compressed air. Moisture in the line rusts the internal mechanisms from the inside out.
The 7-Step Core Process
Here is the physical sequence. I learned the hard way that skipping step three, checking for leaks, wastes a quarter-tank of air before you even pull the trigger.
- Connect the Air Hose. Attach one end of a ¼” or 3/8” air hose to your compressor’s outlet. Use PTFE (Teflon) tape on the threads to ensure a seal. Connect the other end to the nail gun’s air inlet, which is typically a ¼” NPT male thread. Hand-tighten, then give it a small turn with a wrench, don’t overtighten and strip the threads.
- Set the Compressor Pressure. Turn on your compressor and let it build pressure. Adjust the regulator on the compressor or an in-line filter-regulator-lubricator (FRL) unit. Set the output pressure to match your nailer’s requirement. For a general starting point, 90 PSI works for many applications, but you’ll fine-tune this later.
- Check for Leaks. With the pressure set, listen for a hissing sound at the connections. Run your hand around the fittings to feel for air. A leak means lost power and a compressor that runs constantly. Tighten the connection or re-apply tape if needed.
- Load the Nails. Depress the magazine release and pull the magazine open. Load a strip of nails with the points facing down and the heads seated in the channel. Ensure you’re using the correct nail type, angle, and length for your specific nailer, mixing sizes is a guaranteed jam. Close the magazine until it clicks.
- Test Fire on Scrap. Find a piece of scrap wood similar to your workpiece. Place the safety nosepiece firmly against the wood and pull the trigger. Observe how deep the nail sinks.
- Adjust the Depth. If the nail is too proud, increase the air pressure slightly (never exceed the tool’s maximum pressure, usually 120 PSI). If it’s sunk too deep or has blown through the wood, decrease the pressure. Some nailers also have a mechanical depth adjustment wheel or screw.
- Work and Fire. With the depth set, you’re ready. Maintain firm pressure with the safety nosepiece on the workpiece, then squeeze the trigger. Keep the tool perpendicular to the surface to avoid “shiners”, nails that glance off and lie exposed on the surface.
Demystifying PSI and CFM: What Your Manual Actually Means
The two numbers that matter are PSI (pounds per square inch) and CFM (cubic feet per minute). PSI is the driving force. CFM is the volume of air needed to sustain that force.
Manufacturers disagree on the exact CFM needed because tools differ. For example, one Pneumatic Framing Nailer manual specifies 5.8 CFM @ 90 PSI, while a 3-IN-1 AIR FRAMING NAILER manual lists 3 CFM @ 90 PSI, and an AIR NAIL GUN MODEL NO: CNG1C manual states an average of 0.47 cfm. The number is always in your nailer’s manual. If your compressor’s CFM output is lower than the tool’s requirement, the compressor will run non-stop, overheat, and the nailer will lose power mid-stroke.
| Nailer Type | Typical PSI Range | Typical CFM @ 90 PSI | Compressor Tank Minimum |
|---|---|---|---|
| Framing Nailer | 70-120 PSI | 3.0 – 6.0 CFM | 6+ Gallons |
| Finish Nailer | 70-100 PSI | 0.5 – 1.5 CFM | 2-4 Gallons |
| Brad Nailer | 60-100 PSI | 0.3 – 0.6 CFM | 1-3 Gallons |
The driving depth of a nail can be adjusted by increasing or decreasing air pressure (never to exceed the maximum of 120 PSI). We recommend you experiment in a scrap piece of material to determine how far to adjust the unit. . Harbor Freight 3-IN-1 AIR FRAMING NAILER Manual
This is your PSI setting rule of thumb: harder wood and longer nails need higher pressure. One manual specifies 110 PSI for nails 2.5″ and longer in dense wood. Softer woods like pine can often be handled at 70-80 PSI with shorter nails when you compare a how to use nail gun with air compressor guide. Start low and increase until the nail sinks flush.
The Right Gear: Hoses, Fittings, and Maintenance
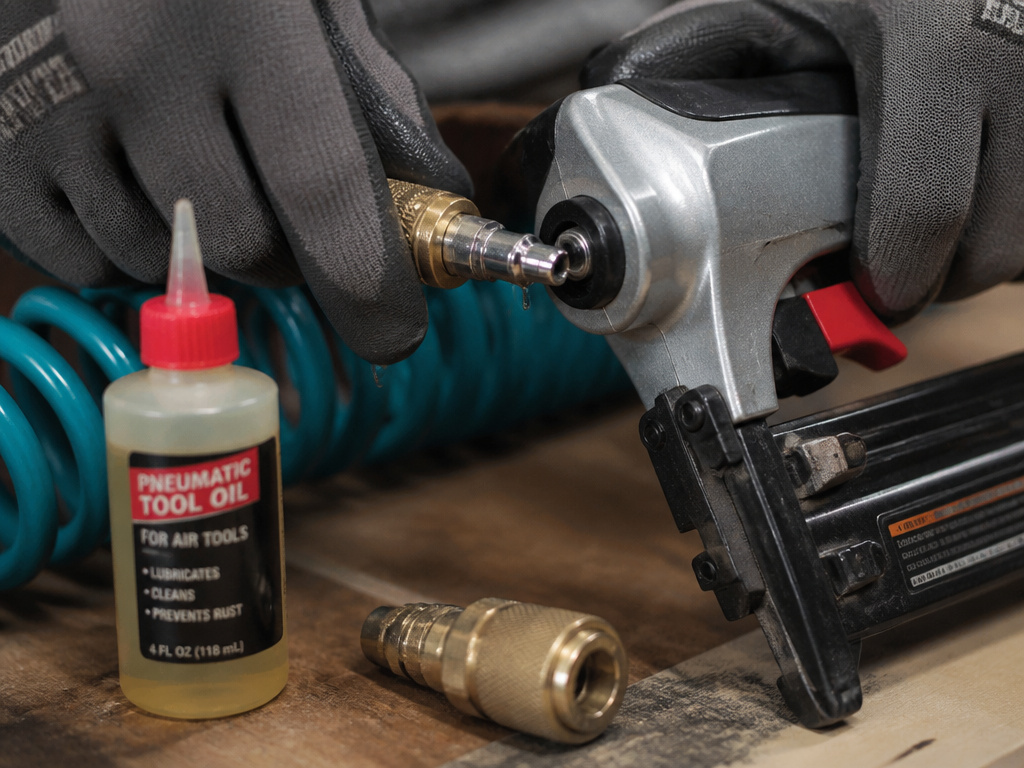
Your air hose is a component, not an accessory. A hose with a ¼” inner diameter is standard, but one manual notes that if an unusually long air hose is required (over 8 meters), the hose inside diameter may need to be increased to minimize pressure drop. The hose must be rated for at least 150% of your tool’s maximum operating pressure.
Quick-connect couplers are a time-saver, but there’s a critical safety rule: never install a female quick coupler directly on the tool. That type of coupler has an internal valve that can trap air, allowing the tool to fire accidentally after you think it’s disconnected. The male plug goes on the tool; the female coupler stays on the hose.
Lubrication is essential. Manuals disagree on procedure when an automatic oiler is used: the CLARKE CNG1C manual recommends adding 2-3 drops of airline oil into the inlet before use regardless, while a generic Harbor Freight manual recommends adding oil only if an automatic oiler is not used. This coats the internal O-rings and cylinder. If you don’t have an auto-oiler, add a few drops every hour of continuous use. A dry nailer will wear out in a season.
For long-term health, knowing how to clean a nail gun and how to oil a pneumatic nail gun will save you costly repairs.
Troubleshooting Common Issues
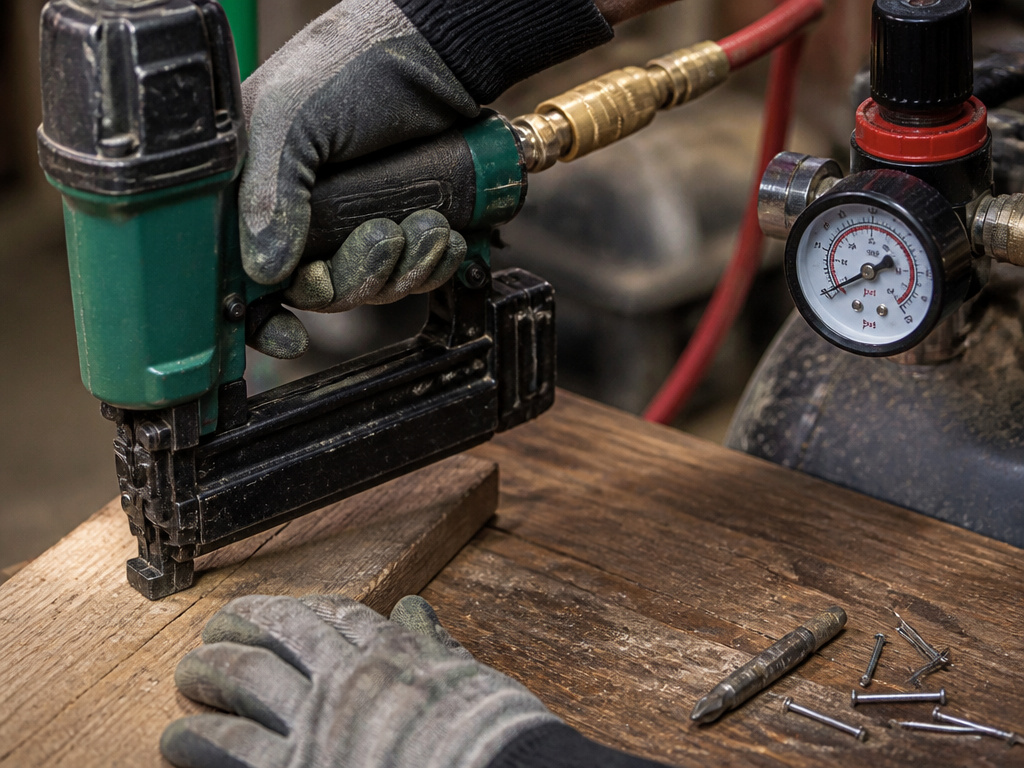
You’ve connected everything, but the tool won’t fire, or the nails aren’t sinking. Here’s where to look.
Common mistake: Cranking the PSI to max when a nail won’t sink. The real issue is often a dull driver blade or contaminated O-rings, which higher pressure won’t fix and might damage.
- Nail gun not firing? First, ensure the safety nosepiece is fully depressed against the workpiece. Check that the air supply is on and the pressure is within the operating range. If it’s a new setup, verify you haven’t put a female quick coupler on the tool itself. Our guide on why is my nail gun not firing has a full diagnostic checklist.
- Nails not sinking? The nail head sits above the wood. Increase the air pressure in 5 PSI increments, testing on scrap each time. If pressure is already high, the driver blade might be worn or the magazine might be loaded with incorrect nails. More help is in our article on why is my nail gun not sinking nails.
- Frequent jamming? This is almost always caused by using the wrong nails, wrong angle, length, or shank size. Empty the magazine completely and reload with the correct strip. Also, check that the magazine angle is set correctly for the nail strip you’re using (e.g., 21° vs. 34°).
- Air leaking from the trigger or exhaust? A constant hiss usually indicates a worn or dirty O-ring in the trigger valve. This requires disassembly and replacement. For this, and for general nail gun safety, always disconnect the air supply first.
Pneumatic vs. Cordless: Which Should You Buy?
This is the real question for many DIYers today. The specs tell one story, but the shop floor tells another.
A pneumatic nailer is a simpler tool. It has a trigger, a piston, and a valve. Its power and speed are limited only by your air supply. For building a deck, framing a wall, or installing trim all day, the consistent power and rapid-fire capability of a pneumatic are unmatched. The upfront cost is lower, but you’re tethered to a compressor and hose.
A cordless nailer is a complex electro-mechanical system. It has a battery, a motor, and a flywheel or solenoid that must generate the impact. It’s completely portable and instant-on. For quick repairs, small jobs, or working where dragging a hose is impractical, it’s fantastic. The trade-off is weight, cost, and the eventual decline of the battery.
Choose pneumatic for power, speed, and cost-effectiveness in a dedicated workspace. Choose cordless for ultimate portability and convenience for lighter, less frequent tasks. Your first nailer should probably be pneumatic; your second might be cordless for the jobs where air is a nuisance.
How to Depressurize and Store Your Air Compressor
After finishing your work, disconnect the nail gun from the air supply and turn off the compressor. This is a required safety step before any maintenance, clearing jams, or when the tool is not in use. To prepare for storage, drain any moisture from the compressor tank daily and keep the inlet filter clean. If your nail gun will be stored or idle for longer than 24 hours, some manuals recommend adding a few drops of pneumatic tool oil into its air inlet and running the tool briefly to coat the internal parts. Store the tool and compressor in a dry place where temperatures do not drop below freezing.
How Does a Pneumatic Nail Gun Work
A pneumatic nail gun is powered by compressed air from your compressor. When you connect the air hose and squeeze the trigger, a valve opens inside the tool. This releases a burst of high-pressure air into a cylinder. The air pressure drives a piston forward at high speed. Attached to this piston is a driver blade that strikes the head of a nail loaded in the magazine. The force pushes the nail out of the nose and into your workpiece. Releasing the trigger resets the piston, and a spring or air pressure returns it, readying the tool for the next nail. The system relies on clean, dry air to function smoothly.
Frequently Asked Questions
How big of an air compressor do you need to run a nail gun?
You need a compressor that can deliver the required CFM at the required PSI. For a framing nailer needing 4 CFM, a compressor rated for 4+ CFM at 90 PSI is required. For continuous nailing, a compressor with a higher CFM output and larger tank capacity is generally better. Our detailed guide on air compressor size breaks it down by nailer type.
What is the recommended air compressor pressure for an air nail gun?
The recommended operating pressure is always in your nailer’s manual; common ranges include 70-110 psi, 60-100 psi, and 70-120 psi depending on the model. Start at 90 PSI for testing. Adjust up for harder wood or longer nails, down for softer wood or shorter nails. Never exceed the tool’s maximum pressure (commonly 120 PSI). More specifics are in our article on the recommended PSI for a nail gun.
Do you need an air compressor to use a nail gun?
For a pneumatic nail gun, yes, you absolutely need an air compressor. There is no alternative power source. Cordless (battery-powered) and gas-powered nail guns do not require a compressor.
Why does my nail gun leak air when I connect it?
Small puff of air when connecting is normal as the coupler seats. A continuous leak indicates a problem. Check that the O-ring inside the quick-connect isn’t damaged or missing. Ensure the connection is tight and that you’ve used thread sealant (Teflon tape) on all threaded fittings. A leak at the trigger often means internal O-rings need replacement.
Can I use any air hose with my nail gun?
You can use any hose with the correct thread (usually ¼” NPT) and a pressure rating above your tool’s maximum. For best performance over distances longer than 25 feet, use a 3/8” inner diameter hose to reduce pressure drop. A proper hose connection is key to avoiding leaks.
The Bottom Line
Using a pneumatic nailer isn’t complicated, but it is specific. Get the PSI and CFM match right first, that’s 90% of reliability. The physical process is just connect, set, load, test, and fire. The part that saves your knuckles and your workpiece is the time you spend testing on scrap and adjusting nail depth.
When you’re done, disconnect the air, add a few drops of oil to the inlet, and fire the tool once into a safe backstop to coat the internals. That five-second habit doubles the tool’s life. For your next project, check our guide on types of nail guns to make sure you’re even using the right tool for the job. A finish nailer can’t frame a wall, and a framing nailer will destroy trim. Start with the right air, end with the right tool.
