
How to Remove Huck Bolts: Cut, Split, and Drive
This post contains affiliate links. As an Amazon Associate, we earn from qualifying purchases.
To remove a standard, permanent Huck bolt, you must mechanically cut or split its collar to release the pin. This means using an angle grinder to slice the collar lengthwise, a drill to weaken it from two sides, or an air chisel to fracture it. For standard permanent Huckbolts like the C50L, no amount of twisting or hammering will unscrew it, as the collar is swaged over the pin’s grooves. However, Huck’s Bobtail R is designed to be removable with torque tools.
That collar is the whole problem. A Huck bolt isn’t a bolt you unscrew; it’s a two-piece rivet system you have to destroy to remove. The pin has grooves, the collar gets crushed into them, and the resulting joint is what makes these things so fantastically vibration-resistant, and such a headache when you need them out. This is why knowing how to remove Huck bolts requires specific destructive methods.
What follows is the toolkit and the sequence for how to remove huck bolts. The guide explains the three proven mechanical methods, when a torch is appropriate, how to handle a sheared-off head, and the critical step to never omit when installing a new fastener.
Key Takeaways
- Permanent Huckbolts like the 1 1/8” C50L are removed only by destroying the collar via cutting, drilling, or chiseling.
- Wear eye protection and keep your face two feet away, the clamp can release suddenly, sending metal shards flying.
- For most accessible bolts, a small-wheel angle grinder is the fastest way to cut the collar longitudinally through the swaged section.
- After removal, replace with Grade 8 hardware using flat washers and a pinch lock nut; do not re-use the hole without proper hardware.
- The new Bobtail R is a removable Huck bolt designed for service; a 12mm size unscrews with about 75 ft-lbs.
What a Huck Bolt Is (And Why It Won’t Unscrew)
You’re not looking at a bolt. You’re looking at a permanent fastener system. The pin has deep, locking grooves. The collar, that smooth, domed sleeve, gets pulled over the pin and crushed, or swaged, into those grooves under immense pressure. This cold-welds the two pieces together. Hutchens Industries, who makes the common 1 1/8” Huckbolt C50L for truck suspensions, calls it what it is: a permanent fastener.
No amount of twisting or hammering will dislodge the pin from the collar of an installed Huckbolt C50L fastener.
That’s from their official removal bulletin. It’s the swaging that does it. The metal of the collar flows into the grooves of the pin. There are no threads to turn against. So your wrench, your impact driver, your cheater bar, they’re useless here. The only way out is through the collar, which is the core of how to remove huck bolts. You have to cut it, split it, or peel it away from the pin.
Before You Start: Tools and Absolute Safety
This isn’t a drill-and-screw job. You’re doing metal demolition. Your tool list is short but specific.
The Core Tools:
- Angle Grinder with Cut-Off Wheel: A small-wheel grinder gets into tight spaces. This is the go-to for most situations.
- Heavy-Duty Drill and Bits: For drilling opposing sides of the collar when a grinder won’t fit.
- Air Chisel with Pointed Bit: For fracturing the collar in a cross-cut pattern, especially in confined areas.
- Hammer and Punch: For driving the pin out after the collar is compromised.
- Vise-Grip Pliers or a Cold Chisel: For peeling back stubborn collar sections.
Before you start: The clamp force on a Huck bolt is extreme. When the collar finally lets go, it can release suddenly. Wear proper eye protection and keep your face at least two feet away from the collar as you work. Gloves and hearing protection are non-negotiable with a grinder or air chisel.
The forum advice is right: a Sawzall is a tough tool for this. The blades wander on hardened steel, and you risk damaging the surrounding material. The grinder, drill, and air chisel give you controlled aggression.
The Core Removal Process: Cut, Split, and Drive
This is the sequence Hutchens Industries lays out. It works for any standard, non-removable Huck bolt.
Step 1: Cut the Collar Longitudinally
Your target is the swaged portion of the collar, the section that was crushed onto the pin. Don’t cut the pin itself yet. You want to slice the collar along its length, right through that swaged area. You can make a precise cut with a small-wheel grinder.
If the bolt is in a tight spot where a grinder can’t reach, switch to a heavy-duty drill. Drill two holes, one on each side of the collar, directly opposite each other. Go deep enough to get through the collar wall and into the pin’s groove. You’re not drilling the pin out; you’re weakening the collar’s grip.
Step 2: Split the Collar Open
Once you have one deep cut (or two drilled holes), you need to open the collar. A cold chisel driven into the cut can start to spread it. Some pins will pop free at this point. Many won’t.
If the pin doesn’t budge, use a chisel or a pair of vise-grip pliers to peel the collar sections back. Grab the edge of the cut collar and bend it away from the pin. You’re essentially un-peeling a banana. This is where you see why they’re so strong, the collar metal is work-hardened and fights you.
Step 3: Drive the Pin Out
With the collar’s grip broken, the pin should drive out. A punch and a hammer usually do it. If it’s stubborn, you might need to switch to a larger chisel and hammer to work it sideways first. The goal is to get the pin moving in the hole without galling the parent material.
Common mistake: Trying to punch the pin out before the collar is fully split. You’ll just mushroom the pin’s end and make the job harder. The collar must release first.
Step 4: Deal with a Broken or Sheared Huck
What if the pin head is already gone? The process is similar, but you start from the other end. You’ll be working on the collar that’s now flush with the surface. A grinder is your best bet to carefully cut into the collar without damaging the hole. An air chisel technique mentioned in forums also works: cut a cross pattern into the remaining collar head, then use the chisel to peel each quartered section back.
Grinder vs. Drill vs. Air Chisel: Which Method Wins?
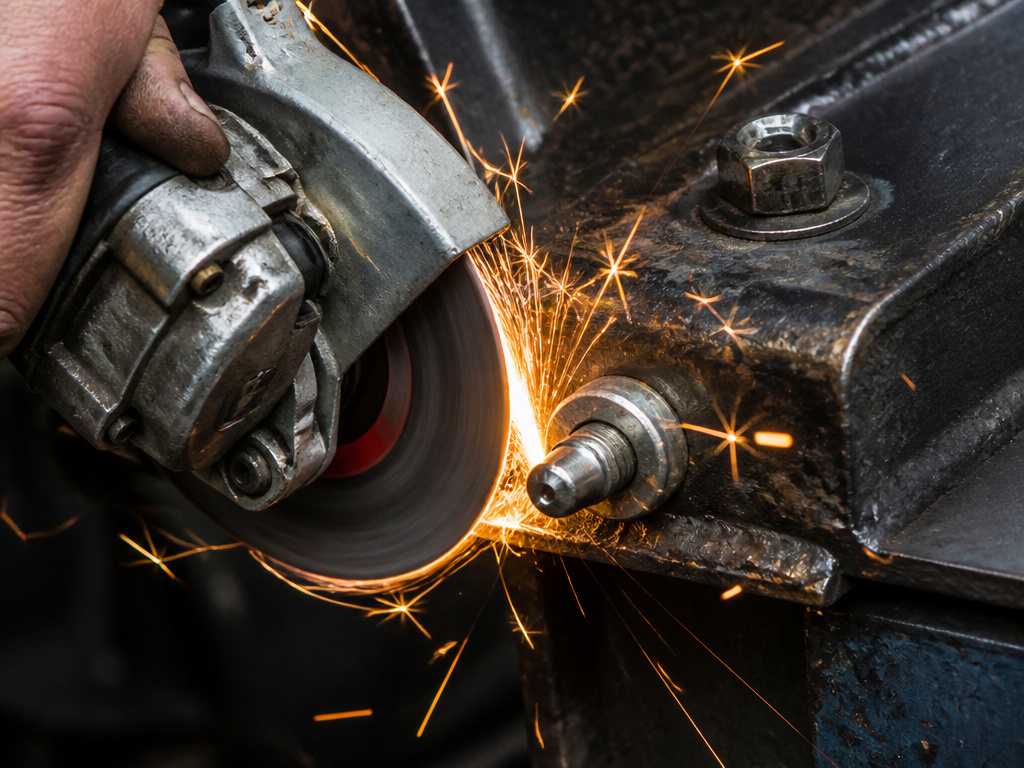
Each tool has a place. Your choice depends on access, the bolt’s condition, and what you have on hand.
| Tool | Best For | Risk If Skipped |
|---|---|---|
| Small-wheel grinder | Accessible bolts, fast removal | Cutting too deep into the pin or parent material |
| Heavy-duty drill | Tight spaces where a grinder won’t fit | Drill wandering, damaging the hole |
| Air chisel | Broken/sheared bolts, confined areas, fracturing collar | Loss of control, damaging adjacent surfaces |
The grinder is the default. It’s fast, direct, and leaves a clean cut you can work with. The drill is the precision option when clearance is measured in millimeters. The air chisel is the brute-force solution for when the bolt is already damaged or you need to split the collar from an awkward angle.
I keep a dedicated cut-off wheel for this. The last time I had to clear a bunch of old suspension Hucks, the grinder was the only thing that made the job manageable. Drilling felt like it took three times as long, and the bits dulled fast.
The Torch Question: When Heat Is a Hard No
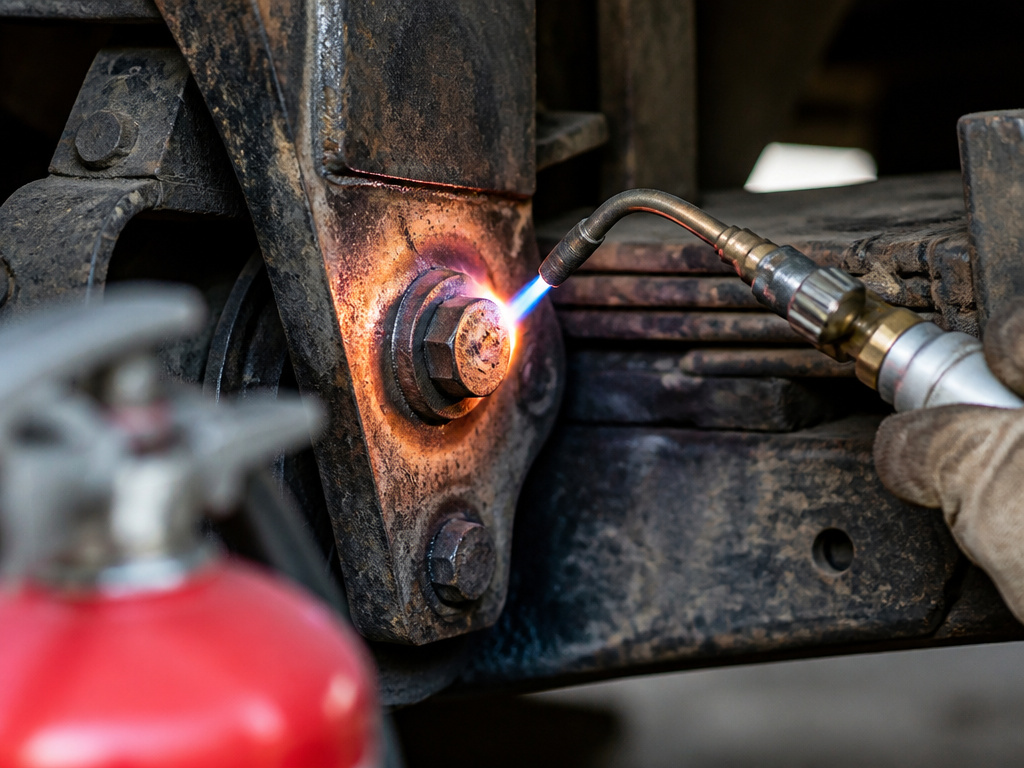
Here’s where manufacturers and field mechanics disagree, and you need to know why.
Hutchens Industries is unequivocal for their C50L fasteners: “Use of a cutting torch may damage suspension components, and should be avoided.” The concern is the intense, localized heat. It can anneal (soften) the high-strength steel in the suspension parts around the bolt, compromising their safety. It can also warp thin metal. However, some field mechanics and anecdotal sources consider a torch an acceptable alternate method if a grinder isn’t available. So who’s right? Both positions exist, for different contexts. The Hutchens warning is for critical, load-bearing suspension joints where material properties are everything. The anecdotal allowance is often for non-critical applications or as a last resort.
Where this goes sideways: Applying a torch to a suspension Huck bolt. You might get the bolt out, but you’ve potentially created a heat-affected zone that cracks under load months later.
My rule: if the Huck bolt is on a vehicle frame, suspension, or any critical structural component, skip the torch. Use a mechanical method. If it’s on a non-critical bracket or attachment and you understand the risk, a torch is a last-resort option. And always, always have a fire extinguisher next to you.
What About Removable Huck Bolts?
Not all Huck bolts are permanent. This is the crucial detail most guides miss. Huck manufacturers have been working on the serviceability problem.
The Bobtail R is the current answer. It looks like a standard Huck bolt but has a hex collar and patent-pending helical lock grooves designed to prevent galling. To remove it, you hold the pin head with a backup wrench and turn the hex collar with a standard torque tool. A 12mm Bobtail R needs about 75 ft-lbs to remove, which Huck notes is less than the average force required to install a comparable bolt and nut.
This design offers a significant improvement. It keeps the vibration resistance of swaging but adds a clean removal path. Previous attempts, like the Huckfit fastener, had removal grooves that galled and deformed, making them easier to grind off than to unscrew.
The catch? You need to know which type you have. If it has a hex collar and looks designed for a wrench, it’s probably a removable type like the Bobtail R. If it has a smooth, domed collar, it’s a permanent fastener that requires destruction.
After the Huck Is Out: Filling the Hole
You’ve got a clean hole. Now what? You can’t just thread another bolt in there. The hole is almost certainly a clearance hole, not a threaded one. And the original Huck bolt filled it perfectly; a standard bolt will be loose.
The right way is to replace with Grade 8 hardware. That’s the consistent advice from experienced mechanics. Grade 8 bolts and nuts have the tensile strength to approach the holding power of the original Huck in a non-swaged joint.
Use a flat washer under the nut (and often under the bolt head too). The nut should be a pinch lock nut (sometimes called a prevailing torque nut), used with flat washers.
Easy to miss: Measuring the hole. The hole is likely a specific size for the Huck’s pin diameter. You’ll need a bolt that fits snugly, not loosely. Measure the hole with calipers or a drill bit set.
What if the hole is wallowed out or damaged from removal? You have three choices: drill it out to the next standard size and use larger hardware, install a threaded insert, or, if it’s a critical location, have it professionally welded and re-drilled.
Are There Special Tools to Cut Huck Bolt Collars?
For standard permanent Huckbolts like the C50L, there are no magic tools that unscrew them. However, collar cutters exist for some models like the Original Bobtail, but they require proprietary Huck tooling. The removal is a mechanical cutting operation. The manufacturer states the collar must be cut longitudinally through its swaged section. A small wheel grinder is often the preferred tool for this job. Some specialized collar cutters are mentioned for specific models like the Original Bobtail, but these require proprietary Huck tooling to use. For the common C50L fasteners on truck suspensions, practical removal relies on common shop tools like grinders, drills, or chisels to split and peel the collar, not on a specialized removal wrench.
Frequently Asked Questions
Are Huck bolts removable?
It depends on the type. Standard Huckbolt C50L fasteners are permanent and require mechanical destruction (cutting, drilling) for removal. The newer Bobtail R is a removable Huck bolt designed to be unscrewed with standard torque tools.
What tool is used to remove Huck bolts?
For permanent Hucks, a small-wheel angle grinder with a cut-off wheel is the most effective common tool. A heavy-duty drill, an air chisel, or a cold chisel and hammer are also used depending on accessibility.
Can you remove a Huck bolt with an impact wrench?
No. For permanent Huck bolts, an impact wrench does nothing because there are no threads to turn. The collar is swaged onto the pin. For the removable Bobtail R, an impact wrench can be used on the hex collar while a backup wrench holds the pin head.
How do you remove a broken Huck bolt?
If the pin head is sheared off, you work on the remaining collar. Use a grinder or an air chisel to cut a cross pattern into the collar face, then peel the sections back with a chisel to release the pin shank. Drilling is difficult because the pin is hardened steel.
What do you replace a Huck bolt with?
Replace a removed Huck bolt with Grade 8 hardware, a bolt, flat washers, and a pinch lock nut. Match the bolt diameter to the hole as closely as possible. Do not use a standard nut and split washer, as it will loosen under vibration.
The Bottom Line
Removing a Huck bolt is a destructive process. You’re not loosening it; you’re cutting it apart. The grinder-and-punch method is the one that works when you have space. When you don’t, the drill or air chisel gets the call.
If the Huck bolt is on a critical suspension or frame component, Hutchens Industries strongly advises avoiding a torch due to heat damage risk, though some field mechanics may use it as a last resort. The risk of hidden heat damage isn’t worth the time saved.
When it’s out, the job isn’t done. That hole needs a Grade 8 fastener. Skip the hardware store generic bolt. Go straight for the Grade 8 and a lock nut. It’s the only way the repair holds.
And the next time you see that smooth, domed collar, you’ll know what it means. It’s not a bolt. It’s a decision someone made for permanence. Your job is just to undo it, one careful cut at a time.
